Google Data Studio and Episerver
Most of Geta's clients use Google Analytics in some way or another to track how their e-commerce store is performing. This is also what we'll be using in our example. Together with Facebooks Ads, Google Adwords and other marketing platform there's a lot of data out there that we can visualize in a nice, easy to understand way, using Google Data Studio.
Step 1: Data source
First step is choosing a data source for the data. There are over 500 data sets and 180 connectors to choose from. For full details: https://datastudio.google.com/data.
- Sign in to Data Studio (free to use)
- Click the + (plus) sign in the top left corner and select Data Source
- Select the Analytics Connector
- You need to grant Data Studio access when asked
- Select Account, Property and View
- And then click connect in the upper right corner
Step 2: Visualize
This step is similar to when working on slides in Keynote or Powerpoint. You have a toolbox with various options for charts, tables, themes & layout, fields to choose from etc. Here you can filter down the data as much as you need. For instance by field, segment, metric, campaign, URL (group by section/site).
For a a great walkthrough and introduction I recommend going through: Welcome to Data Studio.
Step 3: Share report
The report can now be shared with anyone who has the link, by invititation only, or even embedded. What we'll do is embed it into Episerver so that our e-commerce, editors and site admins easily can access it without having to leave.
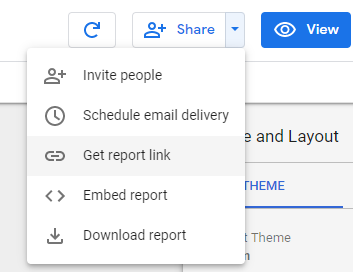
Click Embed report and enable embedding. Then copy the embed URL and save it for later.
In Episerver we'll create a controller that will extend the top menu in Episerver and add our custom reports under Analytics.
[Authorize(Roles = "Administrators, CmsAdmins, CmsEditors")]
[MenuItem(MenuPath, SortIndex = SortIndex.Last, Text = "Analytics")]
public class GoogleDataStudioController : Controller
{
private const string MenuPath = MenuPaths.Global + "/analytics";
[MenuItem(MenuPath + "/overview", Text = "E-commerce")]
public ActionResult Overview()
{
return View();
}
[MenuItem(MenuPath + "/adwords", Text = "Adwords")]
public ActionResult Adwords()
{
return View();
}
}
And the view:
@using EPiServer.Framework.Web.Resources
@using EPiServer.Shell.Navigation
@{
Layout = null;
}
<!DOCTYPE html>
<html>
<head>
<title>Google Data Studio E-commerce</title>
<meta http-equiv="X-UA-Compatible" content="IE=Edge" />
<!-- Shell -->
@Html.Raw(ClientResources.RenderResources("ShellCore"))
@Html.Raw(ClientResources.RenderResources("ShellWidgets"))
<!-- LightTheme -->
@Html.Raw(ClientResources.RenderResources( "ShellCoreLightTheme"))
<!-- Dojo Dashboard -->
@Html.Raw(ClientResources.RenderResources( "DojoDashboardCompatibility", new[] { ClientResourceType.Style }))
</head>
<body>
@Html.Raw(Html.ShellInitializationScript())
@Html.Raw(Html.CreatePlatformNavigationMenu())
<div @Html.Raw(Html.ApplyPlatformNavigation())>
<iframe src="<embed-report-url-here>" style="border: 0; width: 100%; min-height:1200px"></iframe>
</div>
</body>
</html>
For full details on the menu providers and how to extend and work with the navigiation in Episerver I recommend reading through the documentation.
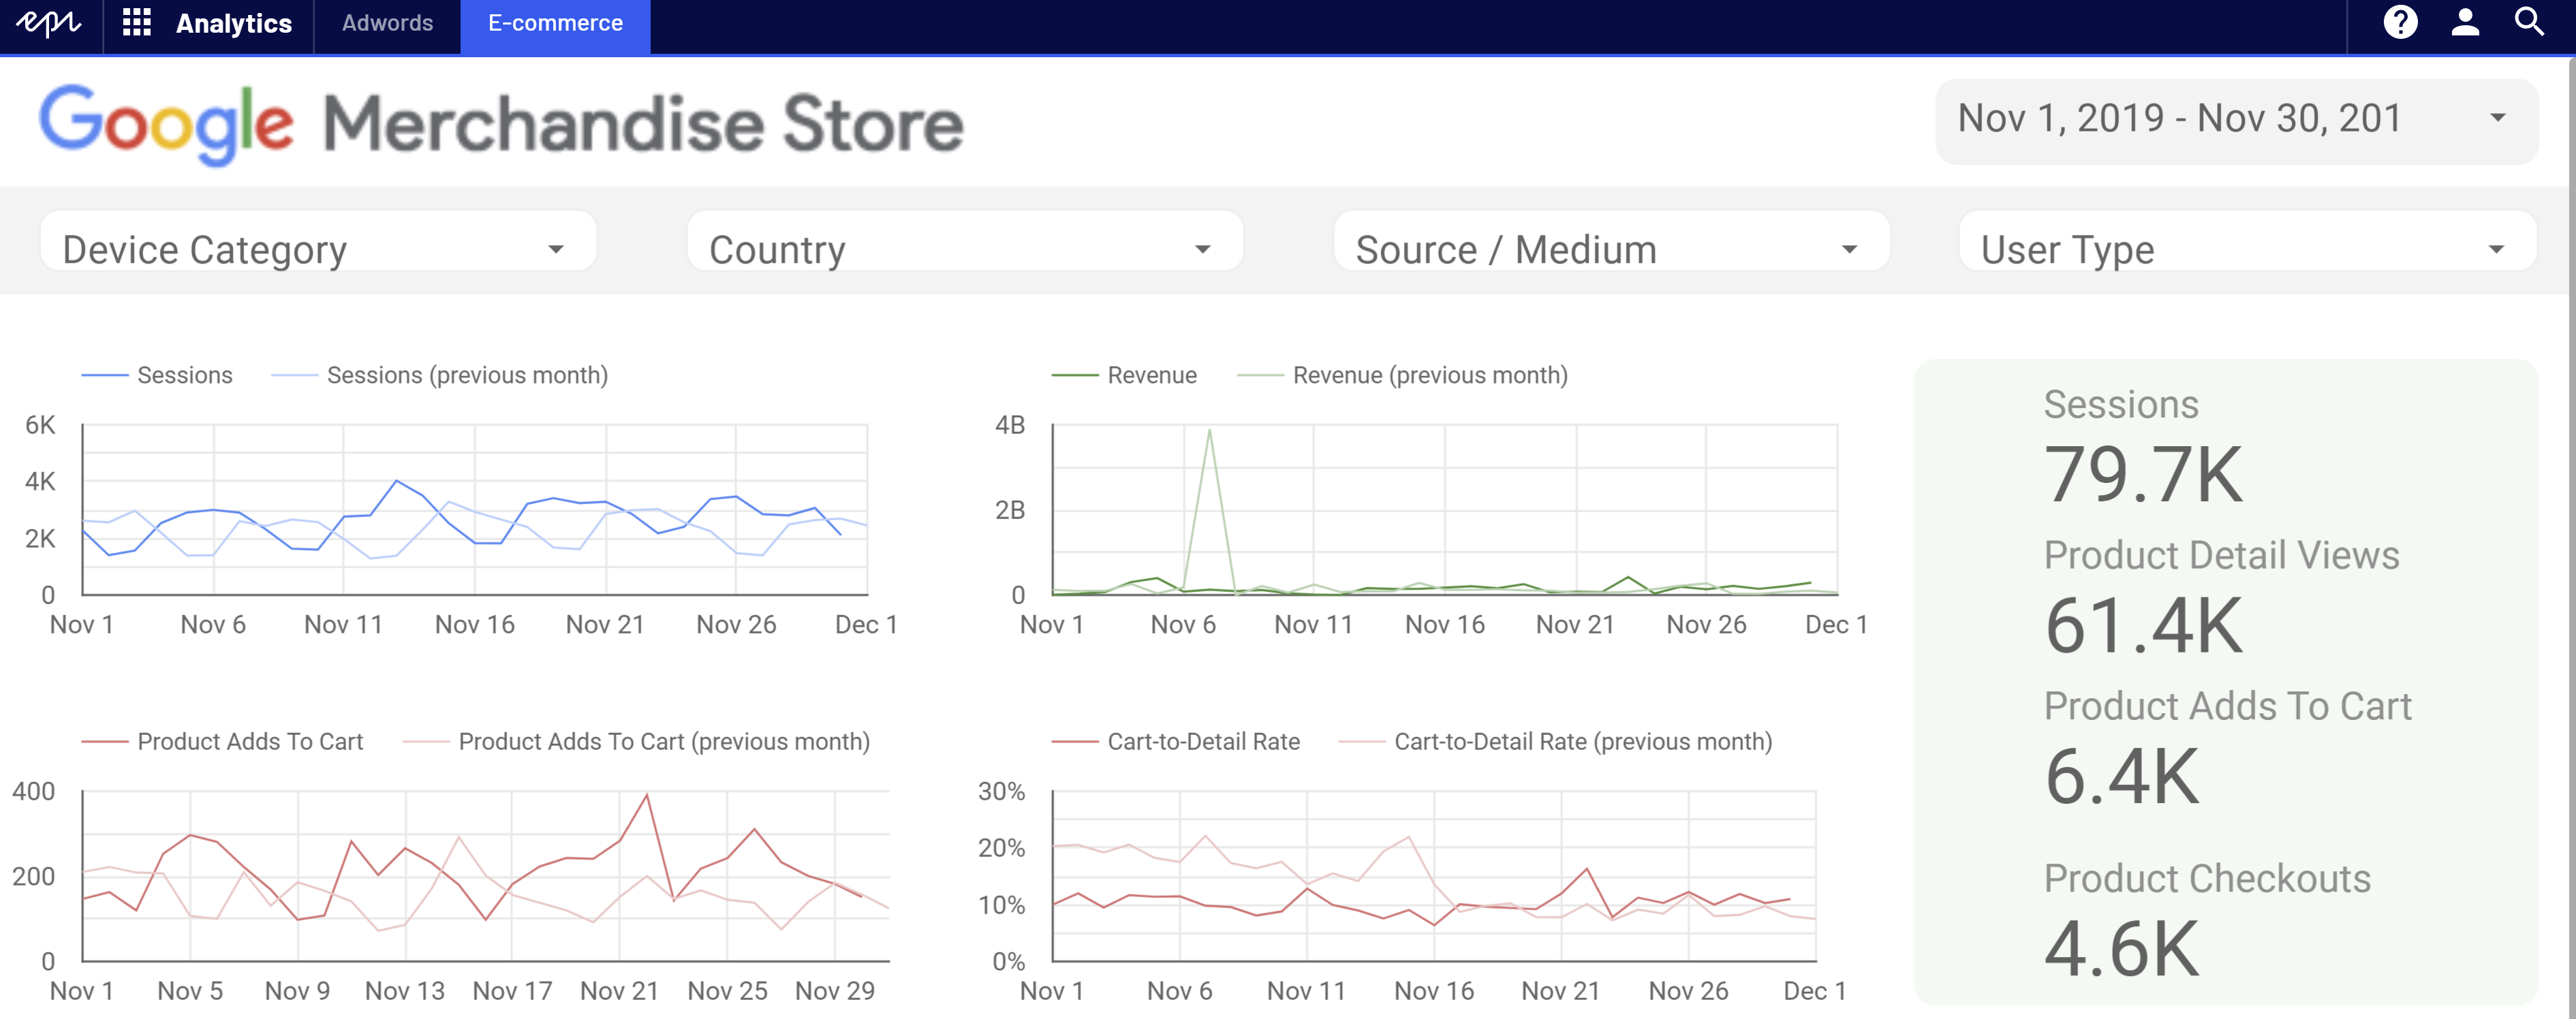
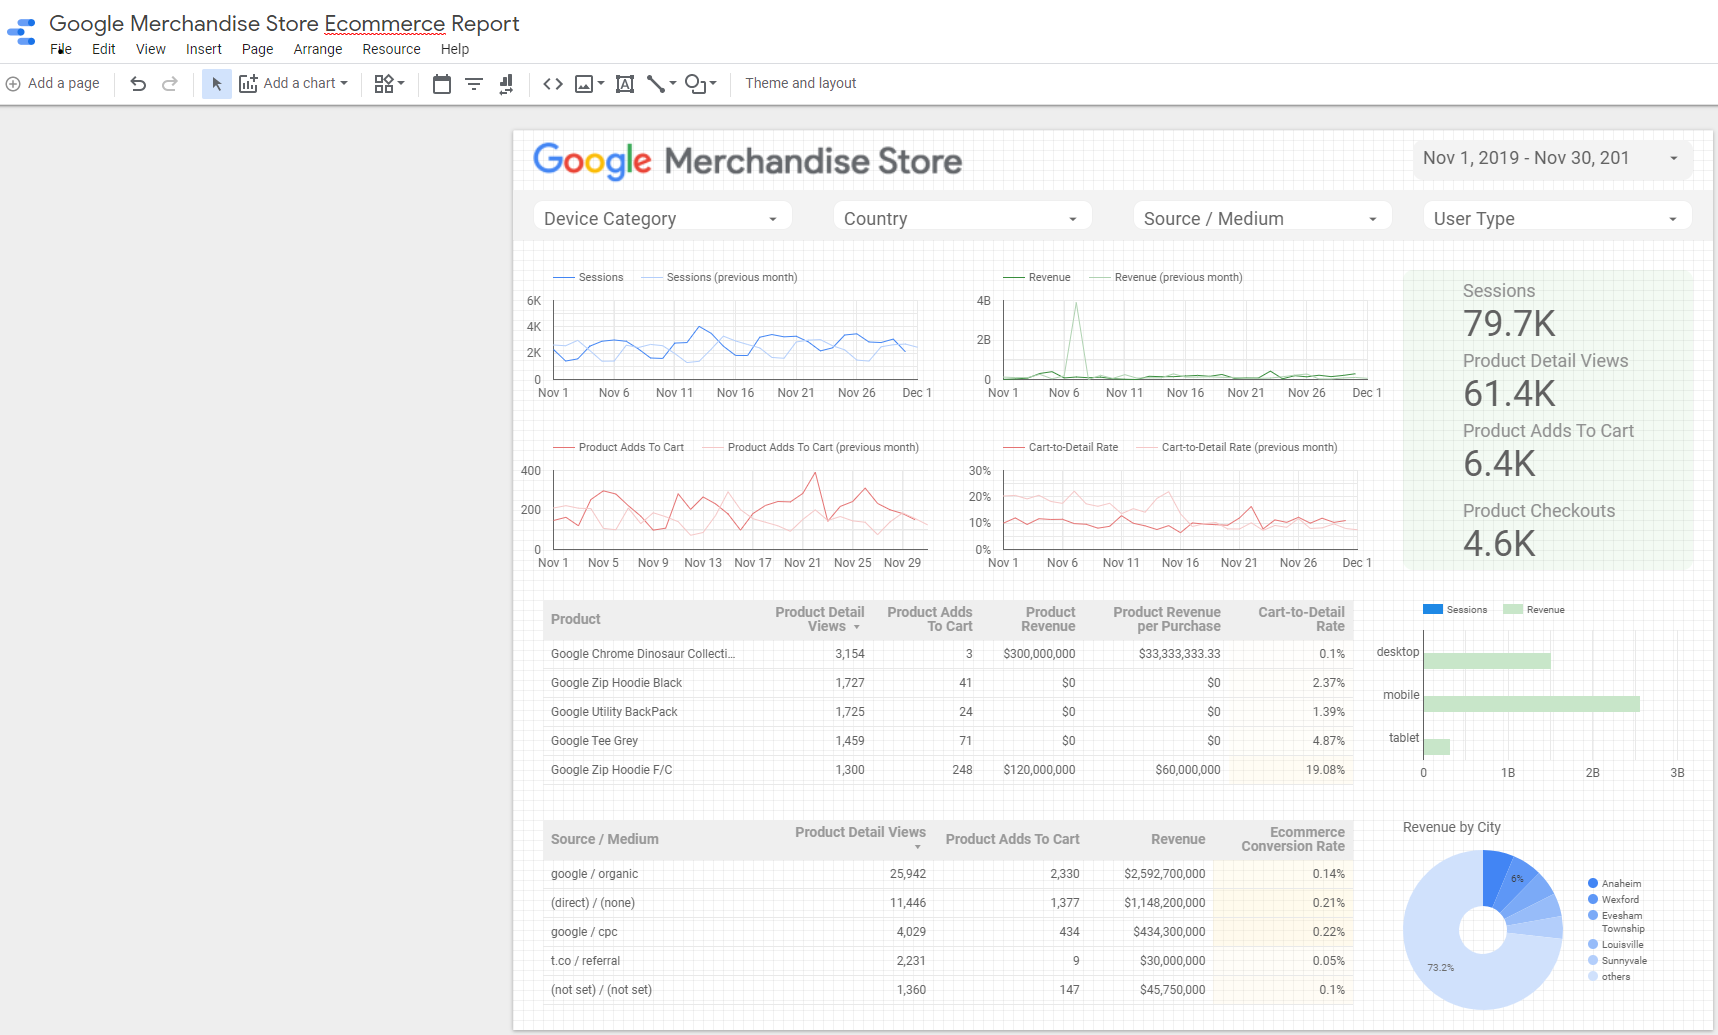
I've taken two sample reports from Data Studio to visualize how it could potentially look in Episerver.