inRiver version 6.3.0 SP2
From inRiver Wiki: "From version 6.3 it is possible to have multiple inRiver servers in one system" inRiver Wiki (requires login)
For this walk-through I will use the Customer1 and Customer2 as the names on the instances installed.
First instance
Download and install inRiver PIM
Once the installation starts, choose Advanced installation
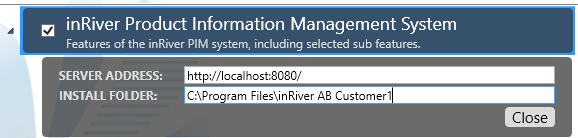
Set server address: http://localhost:8080/
Set installation folder: C:\Program Files\inRiver AB Customer1
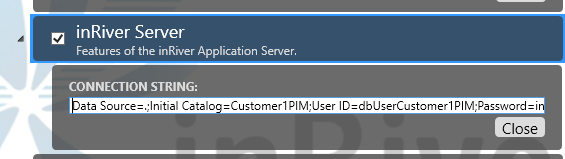
Set database connectionstring
Data Source=.;Initial Catalog=Customer1PIM;User ID=dbUserCustomer1PIM;Password=inriver123
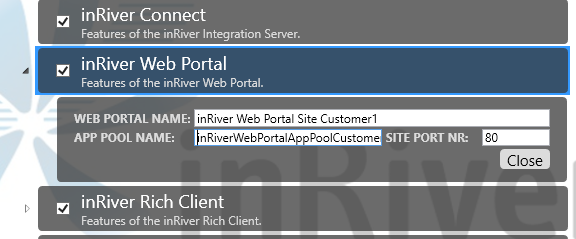
Set web portal name: inRiver Web Portal Site Customer1
Set app pool name: inRiverWebPortalAppPoolCustomer1
Run installation
Create database Customer1PIM with filestream enabled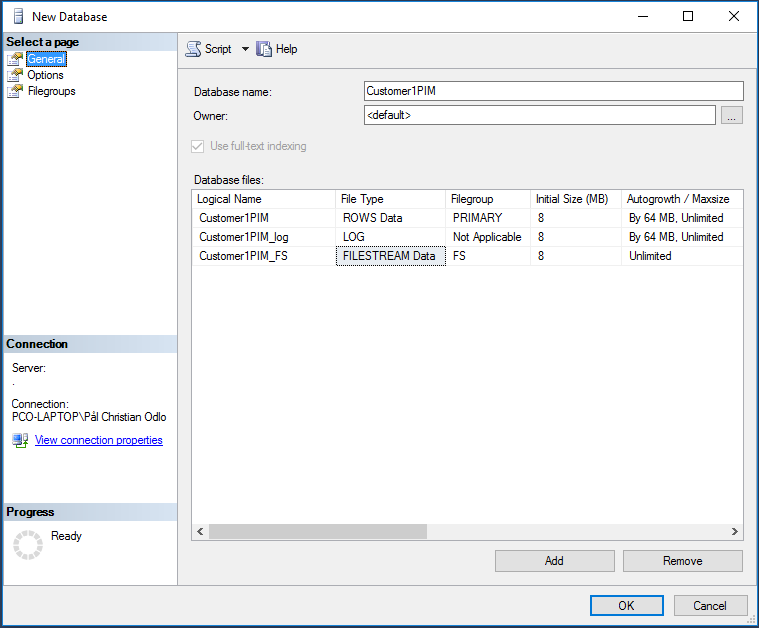
Create login dbUserCustomer1PIM with password inriver123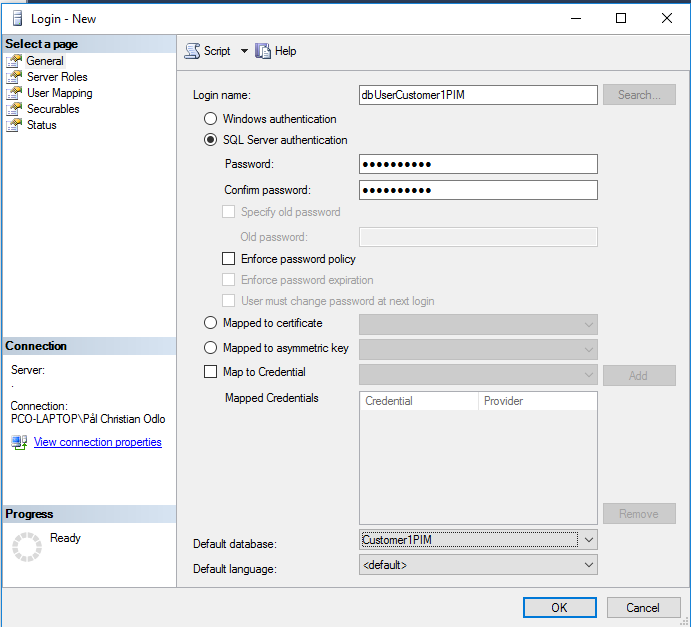
Map the login to Customer1PIM database with db_owner role
Enable configurations
Rename file "C:\Program Files\inRiver AB Customer1\inRiver Server\inRiver.Server.exe.Config.Sample" to "C:\Program Files\inRiver AB Customer1\inRiver Server\inRiver.Server.exe.Config"
Rename file "C:\Program Files\inRiver AB Customer1\inRiver Connect\inRiver.integration.exe.config.Sample" to "C:\Program Files\inRiver AB Customer1\inRiver Connect\inRiver.integration.exe.config"
Change configurations
In C:\Program Files\inRiver AB Customer1\inRiver Server\inRiver.Server.exe.Config, change the message queue names
<add key="ServerInternalLogMessageQName" value="Customer1ServerInternalLog" />
<add key="ConnectNotificationMessageQName" value="Customer1ConnectNotifications" />
In C:\Program Files\inRiver AB 3 Customer1\inRiver Connect\inRiver.integration.exe.config, change the message queue names
<setting name="ServerListenerMessageQName" serializeAs="String">
     <value>Customer1ServerListener</value>
</setting>
 <setting name="ConnectInternalLog" serializeAs="String">
    <value>Customer1inriverConnectInternalLog</value>
</setting>
Delete services created by inRiver installation
In a command prompt with administrative privileges run the following commands
C:\>sc.exe delete InRiverConnectWindowsService6

C:\>sc.exe delete InRiverServerWindowsService6
Create services for the inRiver server and connect services
In a command prompt with administrative privileges run the following commands
C:\>sc.exe create inRiverServerServiceCustomer1 binPath= "C:\Program Files\inRiver AB Customer1\inRiver Server\inRiver.Server.exe" start= auto

C:\>sc.exe create inRiverConnectServiceCustomer1 binPath= "C:\Program Files\inRiver AB Customer1\inRiver Connect\inRiver.Integration.exe" start= auto depend= inRiverServerServiceCustomer1

C:\>sc.exe start inRiverServerServiceCustomer1
Navigate to http://localhost to verify inRiver web portal is up and running
Second instance
Copy the folder "C:\Program Files\inRiver AB Customer1" to "C:\Program Files\inRiver AB Customer2"
Give the user IIS_IUSRS full control on the folder "C:\Program Files\inRiver AB Customer2\inRiver Web"
Change configurations
Open the file C:\Program Files\inRiver AB Customer2\inRiver Server\inRiver.Server.exe.Config in a text editor
Change server address(use a different port than 8080)
<add key="ServerUrl" value="http://localhost:9090/" />
Change message queue names
<add key="ServerInternalLogMessageQName" value="Customer2ServerInternalLog" />
<add key="ConnectNotificationMessageQName" value="Customer2ConnectNotifications" />
Change IntegrationRestServerUrl(use a different port than 8081)
<add key="IntegrationRestServerUrl" value="http://localhost:9091/" />
Change connectionstrings
<connectionStrings>
     <add name="inriver" providerName="System.Data.SqlClient" connectionString="Data Source=.;Initial Catalog=Customer2PIM;User ID=dbUserCustomer2PIM;Password=inriver123"/>
     <add name="inriverResources" providerName="System.Data.SqlClient" connectionString="Data Source=.;Initial Catalog=Customer2PIM;User ID=dbUserCustomer2PIM;Password=inriver123"/>
 </connectionStrings>
Open the file C:\Program Files\inRiver AB Customer2\inRiver Web\Web.config in a text editor
Change server address
<add key="ServerUrl" value="http://localhost:9090/" />
Change client endpoint
<client>
 <endpoint binding="wsHttpBinding" bindingConfiguration="WSHttpBinding_IIntegrationService" contract="IntegrationServiceReference.IIntegrationService" name="WSHttpBinding_IIntegrationService" address="http://localhost:9090/IntegrationService/"/>
</client>
Open the fileC:\Program Files\inRiver AB Customer2\inRiver Rich Client\inRiver.RichClient.exe.config in a text editor
Change server address
<setting name="inRiverServer" serializeAs="String">
    <value>http://localhost:9090/</value>
</setting>
Open the file C:\Program Files\inRiver AB Customer2\inRiver Model Tool\inRiver.PIM.ModelTool.exe.config in a text editor
Change server address
<setting name="inRiverServer" serializeAs="String">
 <value>http://localhost:9090/</value>
</setting>
Open the file C:\Program Files\inRiver AB Customer2\inRiver Connect\inRiver.integration.exe.config in a text editor
Change server address
<setting name="inRiverServerUrl" serializeAs="String">
    <value>http://localhost:9090/</value>
</setting>
Change message queue names
<setting name="ServerListenerMessageQName" serializeAs="String">
    <value>Customer2ServerListener</value>
</setting>
<setting name="ConnectInternalLog" serializeAs="String">
    <value>Customer2inriverConnectInternalLog</value>
</setting>
Change OwinRestServerUrl
<setting name="InternalOwinRestServerUrl" serializeAs="String">
    <value>http://localhost:9091/</value>
</setting>
Create database
Create database Customer2PIM with filestream enabled
Create login dbUserCustomer2PIM with password inriver123 and map the login to Customer2PIM database with db_owner role
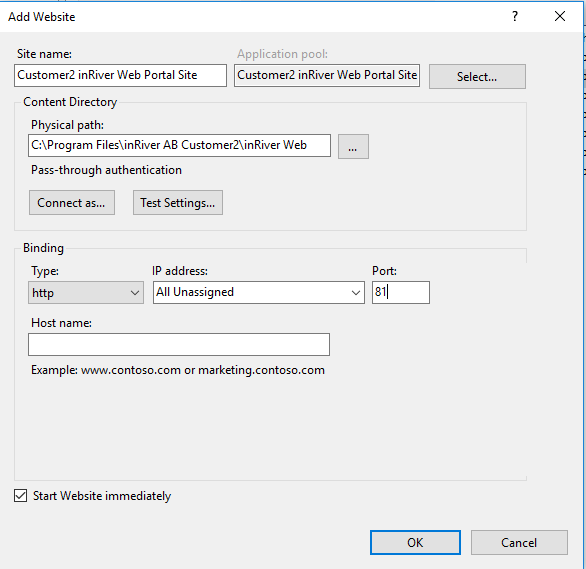
Create website in IIS
Add website
- Set site name: Customer2 inRiver Web Portal Site
- Set physical path: C:\Program Files\inRiver AB Customer2\inRiver Web
- Set port: 81
Create services for the inRiver server and connect services
In a command prompt with administrative privileges run the following commands
C:\>sc.exe create inRiverServerServiceCustomer2 binPath= "C:\Program Files\inRiver AB Customer2\inRiver Server\inRiver.Server.exe" start= auto

C:\>sc.exe create inRiverConnectServiceCustomer2 binPath= "C:\Program Files\inRiver AB Customer2\inRiver Connect\inRiver.Integration.exe" start= auto depend= inRiverServerServiceCustomer2

C:\>sc.exe start inRiverServerServiceCustomer2
Navigate to http://localhost:81 to verify inRiver web portal for Customer2 is up and running
NOTE: If you use host name on the websites, all inRiver Web Portals could run on port 80. This way it is easier to remember the url for each inRiver Web Portal
Contact us